
Get the Project on Screen
From PBMX download to a live Peakboard Box / BYOD
So you’ve grabbed one of the Guru’s projects. Now you want it running on an actual screen on the wall - not just previewing on your laptop. Here’s how the PBMX file makes its way onto a Peakboard Box (the little box we sell) or your own BYOD hardware (Bring Your Own Device - any Windows machine running the Peakboard Runtime).
The whole trip takes five steps and about as many minutes.
What you need
- The PBMX file from the article you liked. Every project here has a download button.
- Peakboard Designer on your Windows PC. It’s free - grab the Community Edition if you don’t have it yet.
- A target to run it on: a Peakboard Box, or any Windows device set up as BYOD with the Peakboard Runtime installed.
- A monitor (HDMI), network connection, and power for that target.
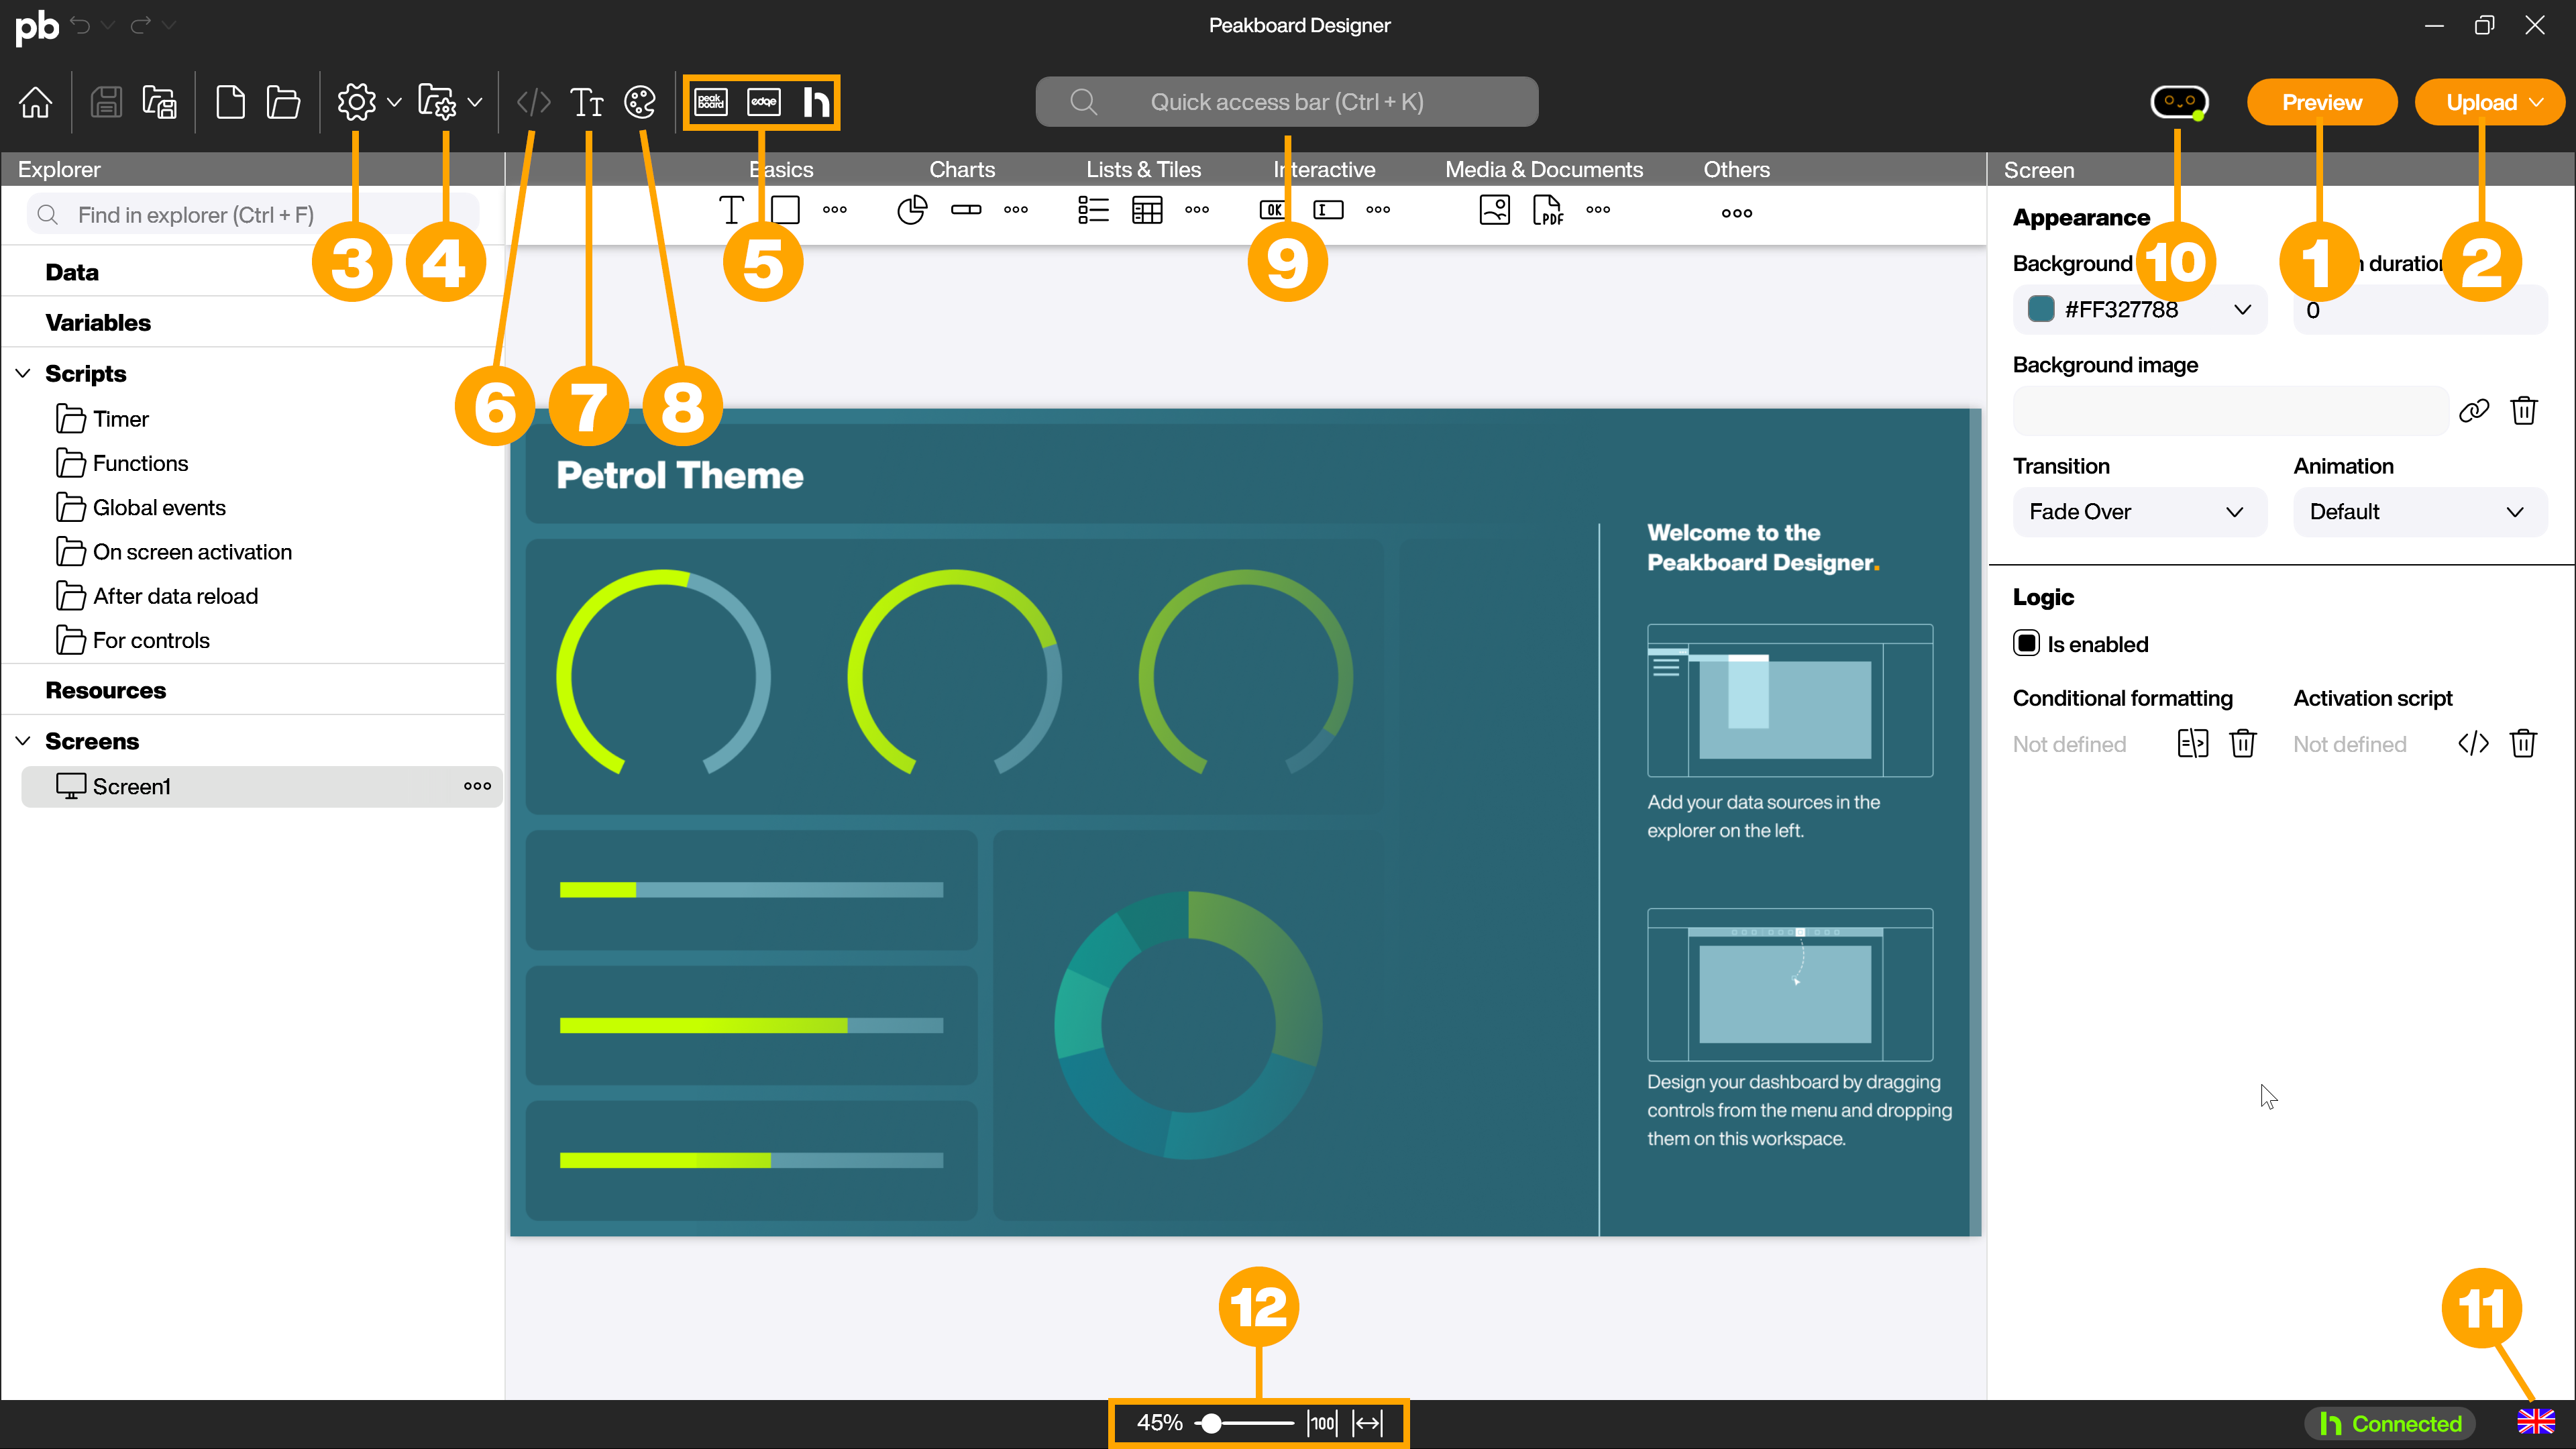
Step 1 - Open the project in Peakboard Designer
Double-click the downloaded .pbmx file, or drag it onto the Peakboard Designer window. The full project opens up - screens, data sources, scripts and all. Have a poke around, change the colors, point a data source at your own system. It’s yours to remix.
When you’re happy, look at the top-right corner. The Preview button lets you test-drive it locally; the Upload button is the one that ships it to a box.
Step 2 - Boot and connect your Box / BYOD
Plug the monitor into HDMI, hook up the network cable, and connect power. The device boots into its initial screen and shows you its IP address once it’s on the network.
Make a note of that IP - you’ll need it in the next step. (No network cable handy? You can set up Wi-Fi straight from this screen too.)
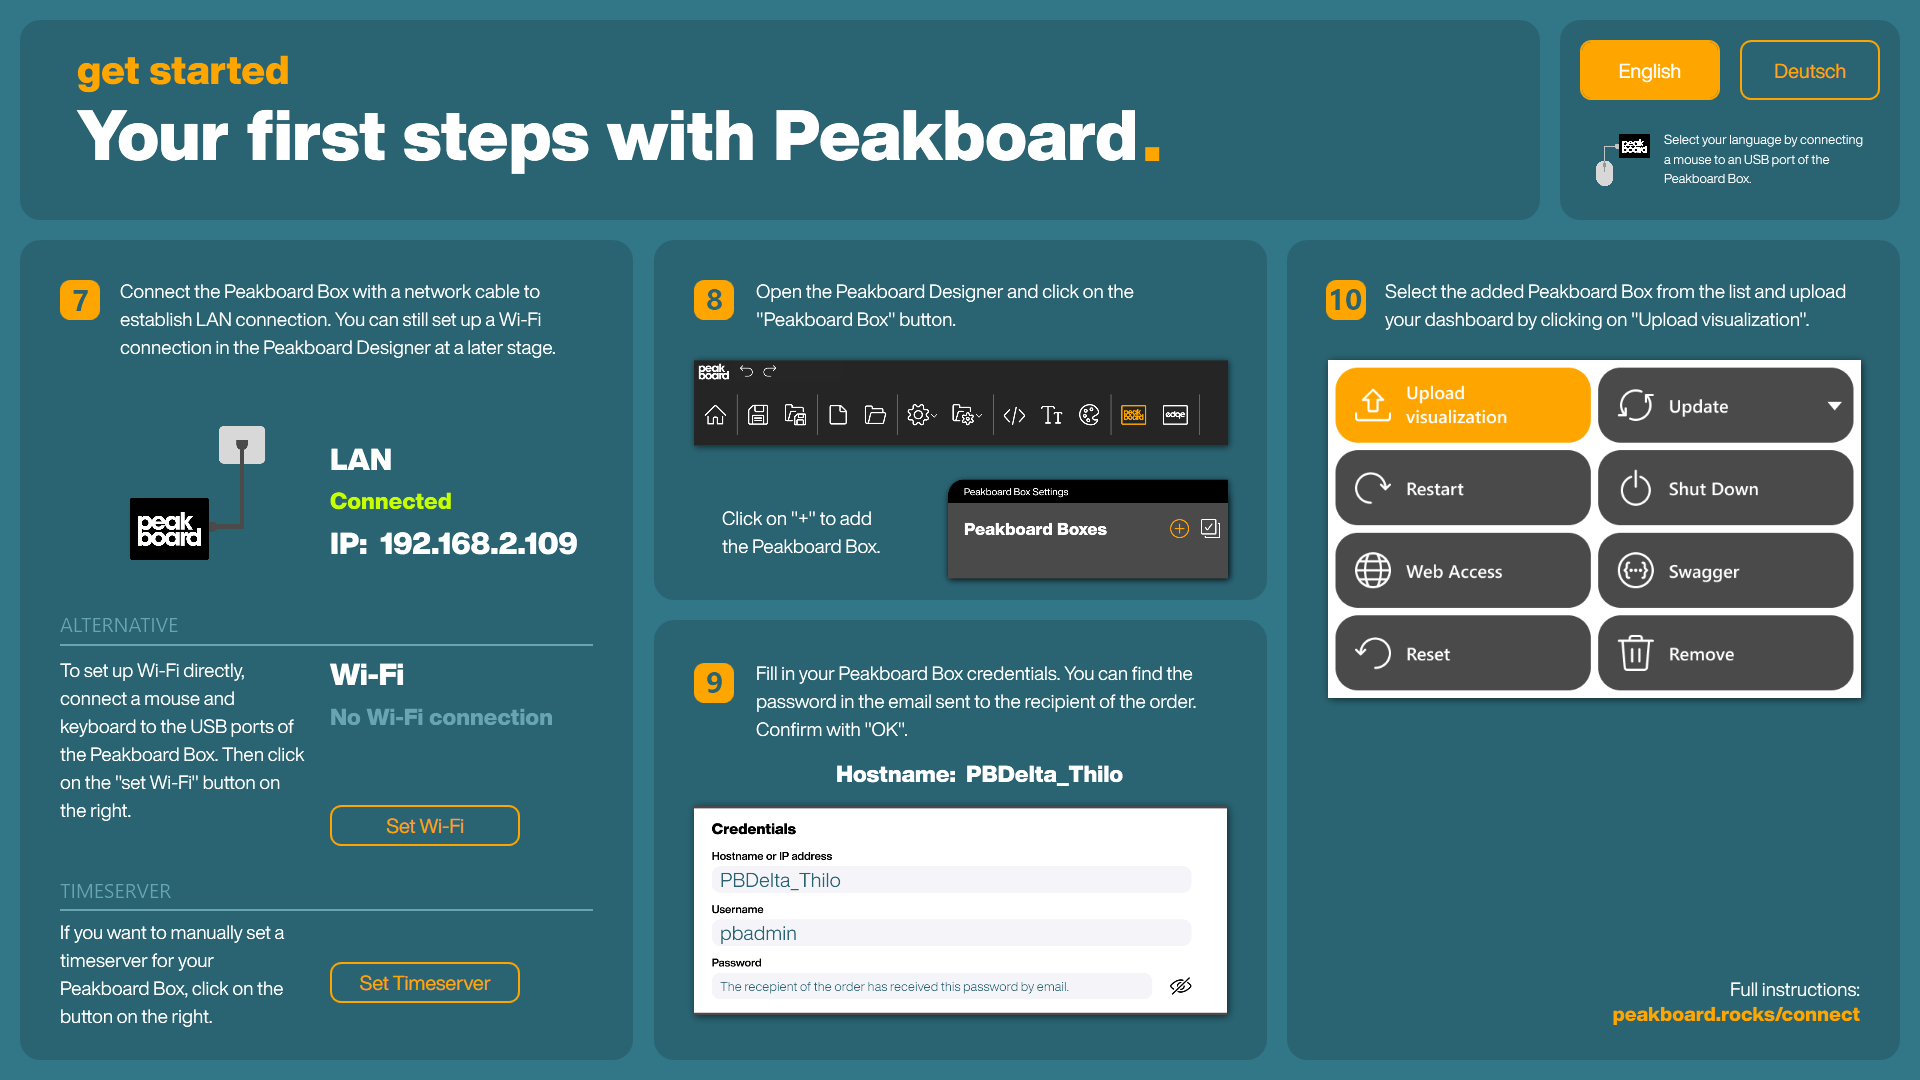
Step 3 - Pair the Box in the Designer
Back in Peakboard Designer, register the device so it shows up as an upload target. Open the Peakboard Box settings, add a new box using the IP address from Step 2, and confirm with the box credentials (the hostname and password shown on the initial screen).
Once it’s paired, the box appears in your list and stays there for next time.
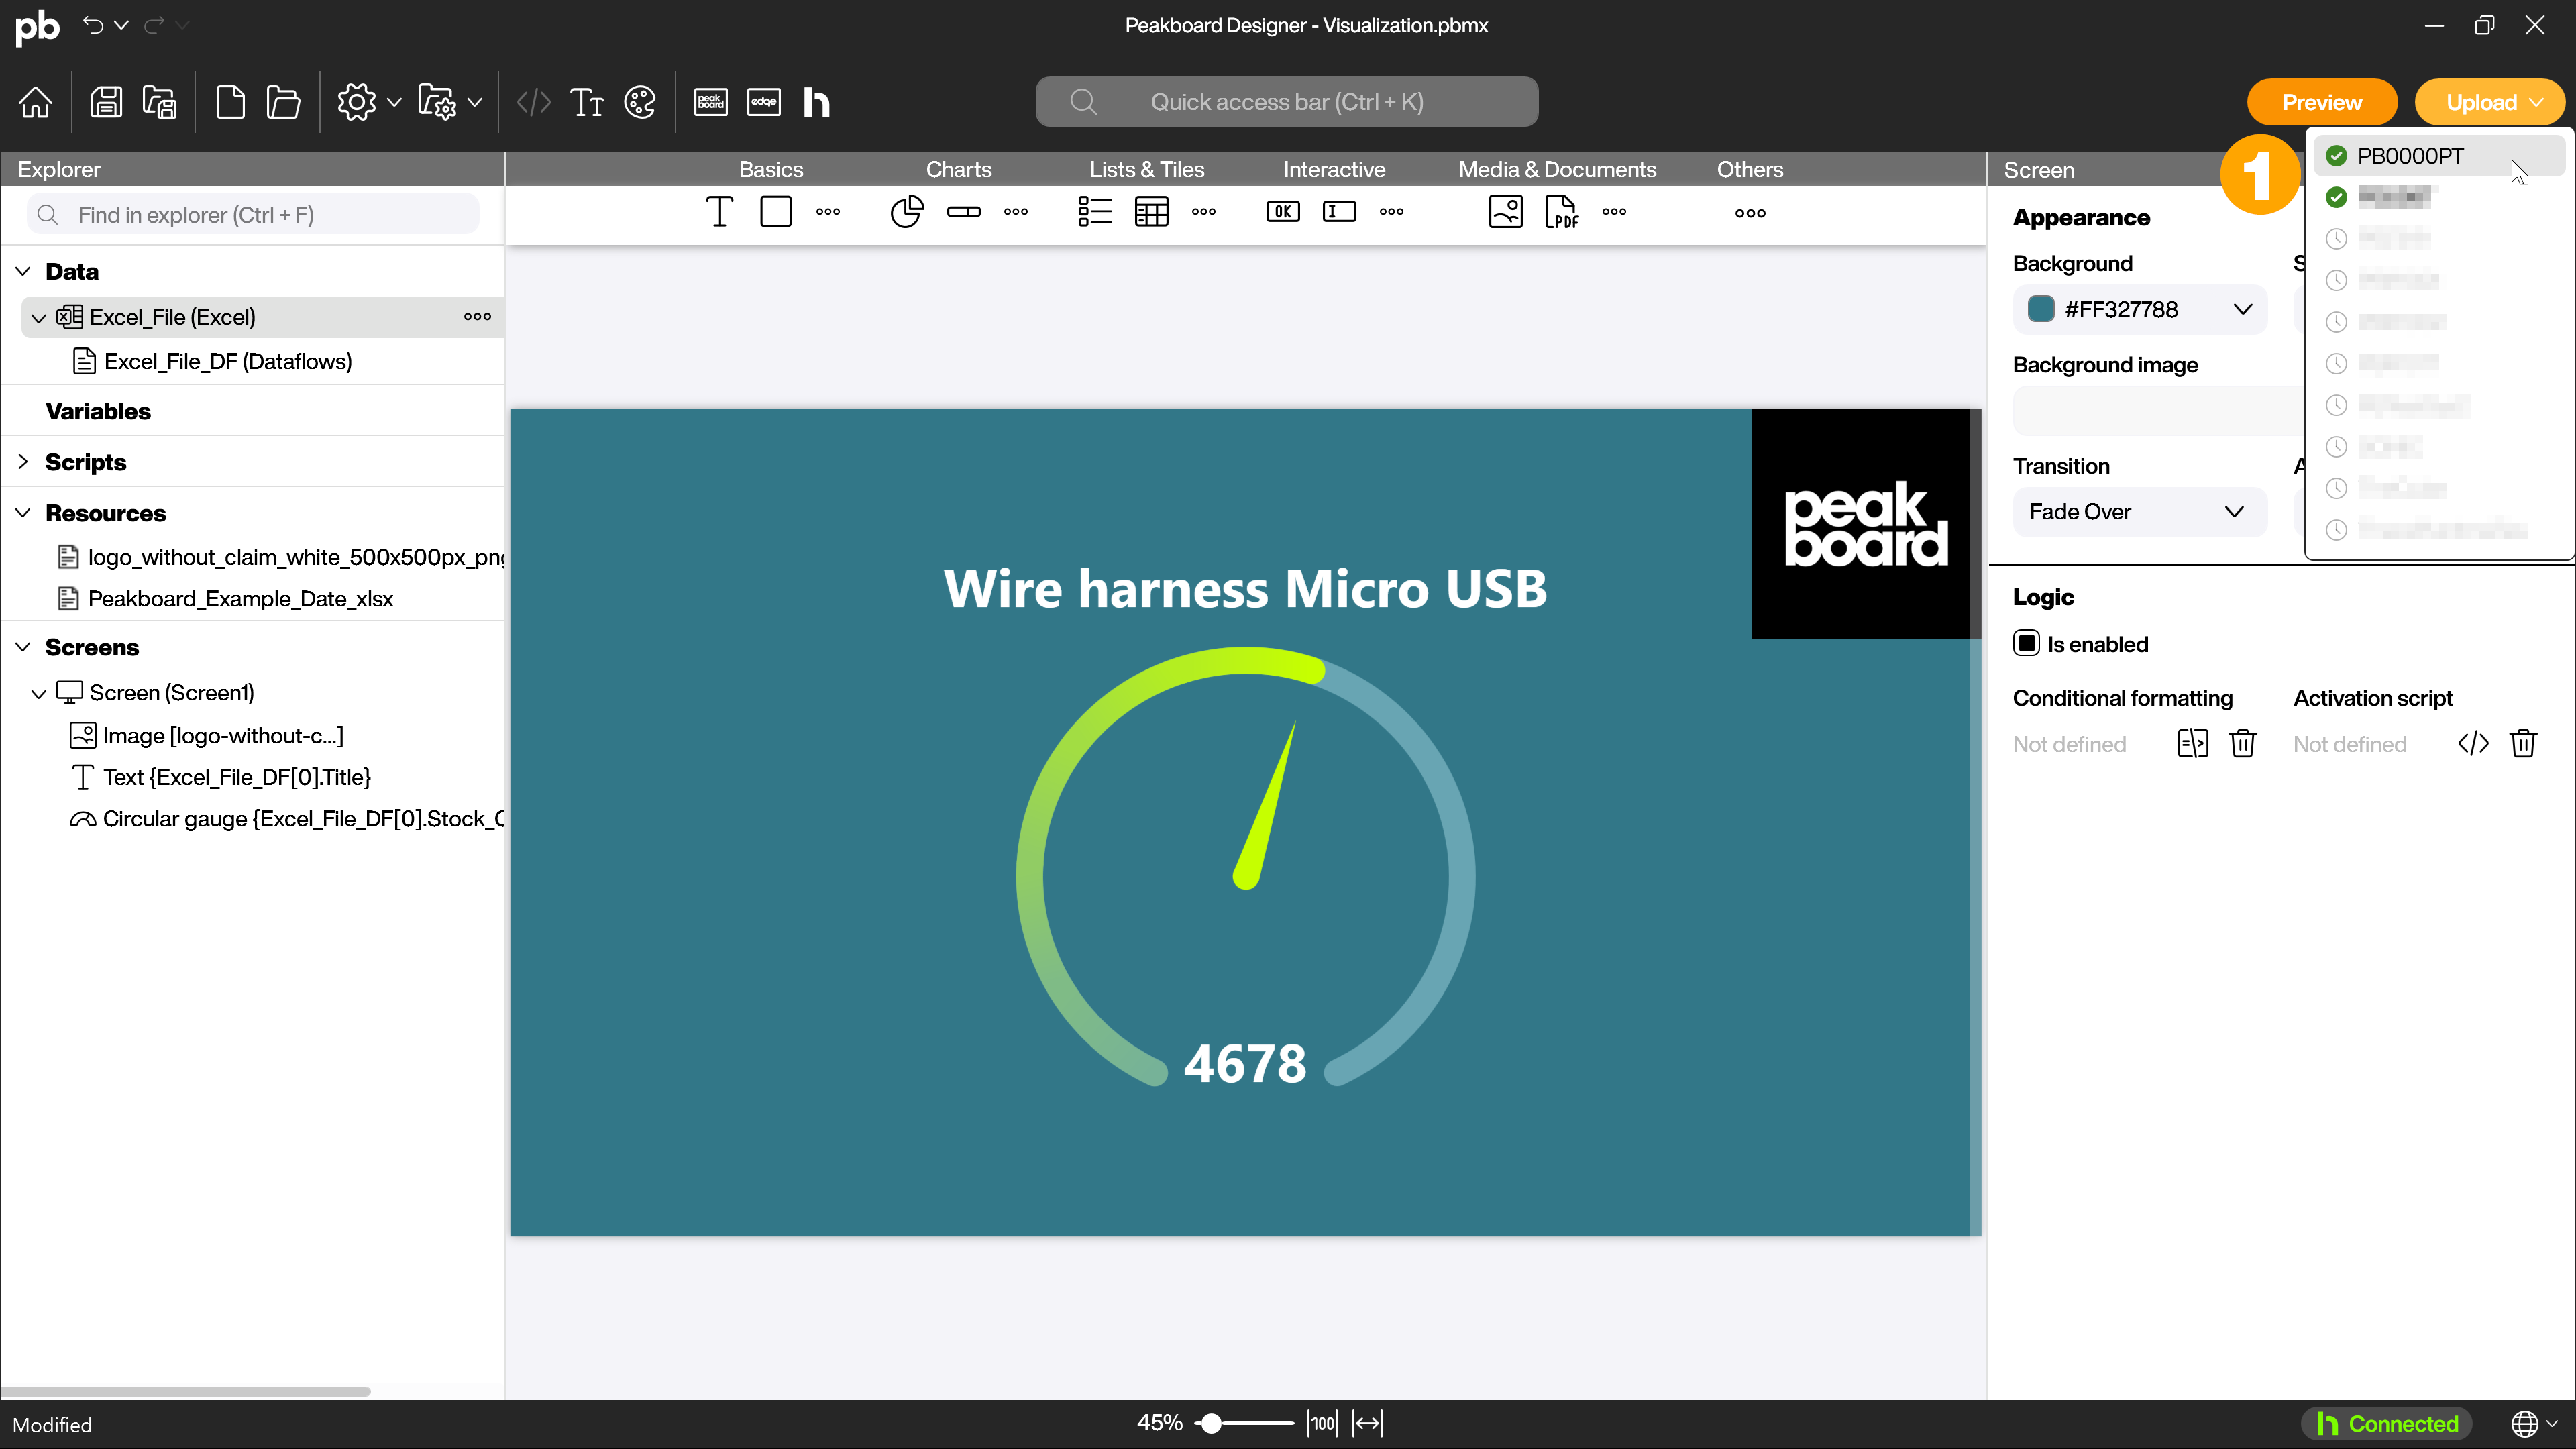
Step 4 - Upload the visualization
Click Upload in the top-right, pick your box from the list, and hit Upload visualization. The Designer packs up the project and sends it over the network to the device.
Step 5 - Watch it go live
If the upload succeeds and nothing else is already running, the project shows up on the connected monitor right away. That’s it - your dashboard is live.
A box can store several projects, but only one runs at a time. Upload a different one whenever you want to switch.
That’s the short version. For every screw, cable and edge case, the official docs have your back: help.peakboard.com.
May your uploads always succeed on the first try.